
Components #
Pre-Development Setup #
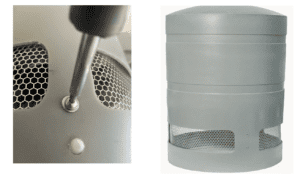
Remove the screws on the side of the shell and gently lift off to expose the internal components
- Install a SIM card if one was not provided to Vetted during the build process.
- Remove the two screws holding the device to the metal frame.
- Remove the two screws holding the SIM card slot cover in place.
- Install the SIM card, replace the cover, and attach it back to the frame.
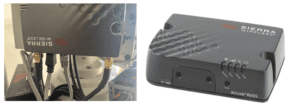
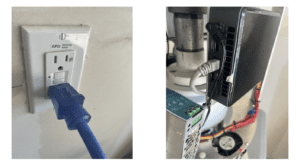
- Plug the power cord into an electrical outlet, then plug an HDMI cable, monitor, keyboard, and mouse into the Intel NUC.
- Once the monitor and keyboard/mouse have been hooked up, verify the Internet and configure the APN.
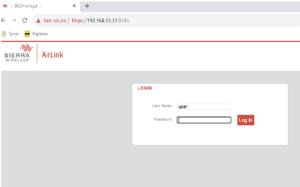
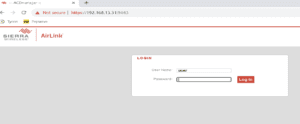
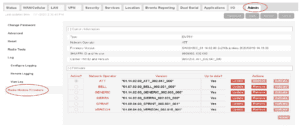
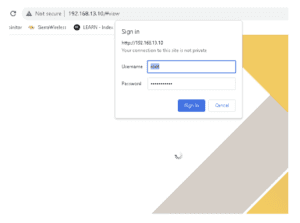
- Open the web browser and type https://192.168.13.31:9443 in the address bar and hit enter.
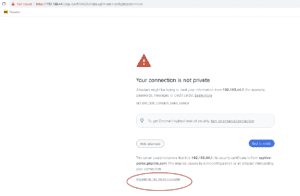
- Select Advanced
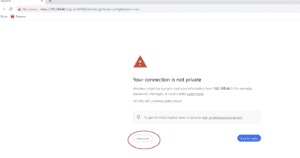
- Select proceed to 192.168.13.31
Enter the username and password you have been provided.
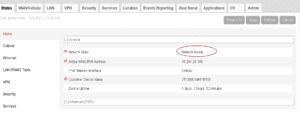
- The home screen will show the status
- Select the Wan/Cellular tab and then SIM slot configuration tab the next steps will need to be done for both SIM slots

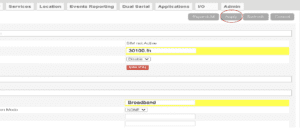
- Click into the Override APN block, then type your APN in the field below.
- Select APN Back up and type the standard non-static APN for your Cellular provider in as the backup

Select Apply and confirm
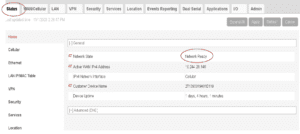
- Select the Status tab. Allow a few minutes for the changes to take effect. You should see Network Ready on the home screen
- While here, it is a good idea to check the firmware version.
Select the Admin tab, Radio Module Firmware, and update as needed
- (CBP ONLY) Now that we have Internet, exit the web browser.
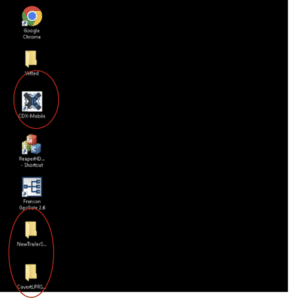
- From the Home screen, run all necessary files and install CDX if it has not been installed already.
- Next, Open CDX and select the Add button.
- Camera name will be Vigilant followed by the camera serial number with no dashes or spaces.
- Camera IP will be axrtsp://192.168.44.10/axis-media/media.amp.
- Ensure 192.168.44.10 is the correct IP address of the camera, if not substitute with the correct IP address.
- The camera model will be RTSP Camera.
- Insert the username and password you have been provided.
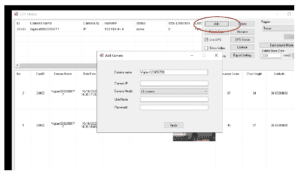
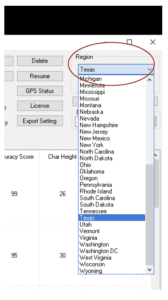
- Select Region and choose your region from the drop-down menu.
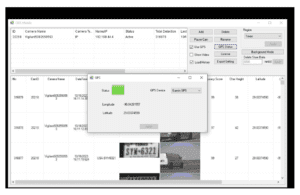
Verify GPS is working by ensuring the use GPS tab is selected and clicking GPS Status. It should show green with accurate coordinates
This concludes the pre-deployment setup.
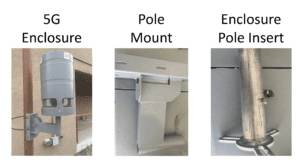
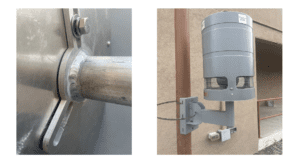
Enclosure Installation #
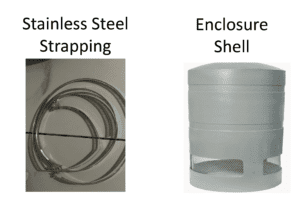
Hold the pole mount bracket to the pole, slip the metal banding through the side slots, and tighten.
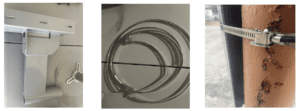
Attach the enclosure pole insert to the bottom of the 5G Enclosure and slide into the pole mount.
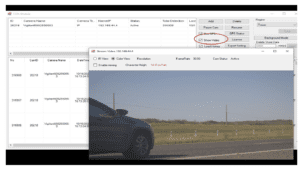
- Remote into your PC or hook up a monitor, keyboard, and mouse.
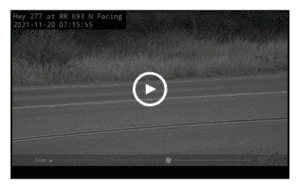
- To adjust the camera aim, click Show Video to pull up a live feed.
- The IR and color view circles will alternate the image.
- For daylight deployment you will want to use the color view, and IR for the night.
- To adjust the camera, open the web browser and type in the camera’s . IP address listed on the label located inside of the enclosure.
- If the IP address is not known, this can be found using the Axis IP utility tool.
Log in #
- Use the username and password you have been provided.
- If the Username and Password have not been set, refer to the Axis Q6135 programming guide and continue once completed.
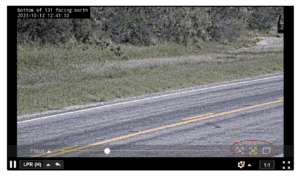
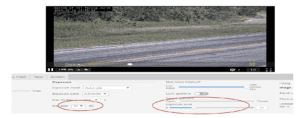
Press the Play Button #
Adjust the zoom and aim the camera using the crosshairs in the center of the field of view.
(These cameras capture better with a zoom around 20% or more.)
Change from zoom to focus.
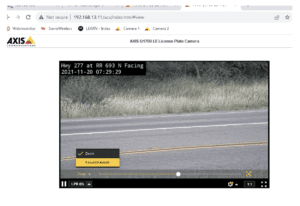
- Set the Focus of the camera to Manual and then back to Autofocus.
- Once the camera has finished focusing it MUST be left on Manual.
Note – this should only be done during daylight hours.
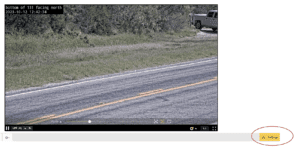
Click on Settings on the bottom right.
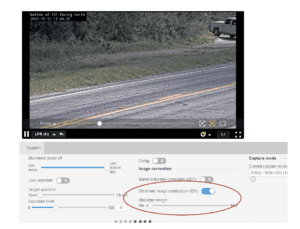
In Image, arrow over until you see this screen and set the Electronic Image Stabilization as needed.
Select the Overlay tab and then Create Overlay.
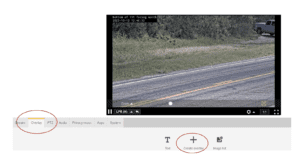
Label the road name and direction of travel then hit Date and Time.
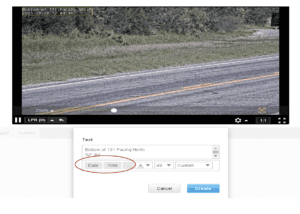
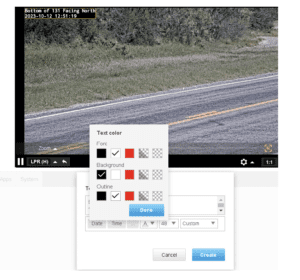
- Select the font option.
- Change the background to black and the outline to white.
- Then hit Create.
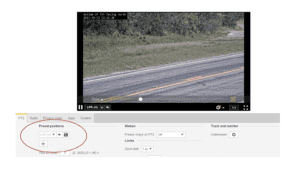
Select the PTZ tab and then hit the save button to lock the zoom and focus settings.
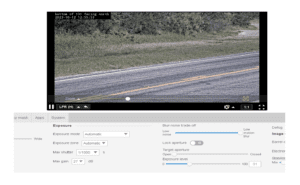
Select the Image tab and arrow over to the screen below.
- Verify Plate reads inside of your LPR Software.
- If plate reads are dark or washed out at night, use the max gain and exposure level settings to adjust as needed. (Higher equals brighter)
(Increasing the Gain will brighten the image overall, however it will also increase noise. Increasing exposure increases the light gathered. This can cause the plate to be washed out if too high or illegible if too low.)
Vetted Security Solutions Support #
The Vetted Security Solutions Support team is committed to answering all your day-to-day questions as quickly as possible. Please see the steps below for the support process:
- Go to https://vettedsecuritysolutions.com/support/
- Click on the “Support Ticket” Icon
- Choose from the following options: LPR Technical Support, License Key Request, Account Management, CCTV and Surveillance, Thermal Camera Support, or Other Questions.
- When opening a support ticket, if you have multiple physical sites and or equipment impacted, please create an individual ticket for each. Do not bundle multiple different physical sites/equipment in the same support ticket.
- Please provide the following information: Your Name (Contact Name), Phone Number, Email, Company/Department, a summary, and a detailed description of the issue you are having. Attachments are optional.
- Press send to notify our help desk, and a confirmation email will be sent to the email address that you have provided.
- Once the ticket is updated/ or closed, it will send you an email notifying you that the support request has been modified/ or completed.