
Table of Contents

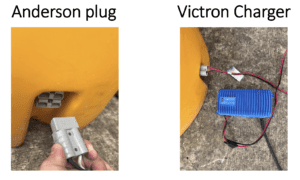
Charging your Attenuator #
- Once you have unpacked your Attenuator, you need to ensure it is fully charged before your deployment.
- Do this by attaching the Victron Smart Charger to the Anderson plug located at the bottom of the enclosure and then plug into a 110 electrical outlet and allow a full 24-hour charge.
Please note – if you have a battery bank extender you will want to charge it for a full 24 hours as well.
Charging Your Attenuator (Continued) #
- Once the Attenuator has been plugged into the wall, you should see the charger’s indicators light up.
- For more detailed information on the charging process, download the Victron Connect app from the app store on your phone.
- Once downloaded, open the app and select the Blue Smart Charger from the list.
- The first time you attempt to connect the phone it will ask to pair with the Victron product. Enter the PIN code. The default PIN code is 000000 unless your device already has a random PIN code which is then printed on a sticker attached to the device (contact Customer Support if needed).
- If fully charged, your Attenuator should be in Float mode.
Powering on Your Attenuator #
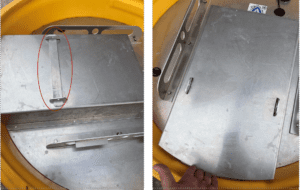
- Begin by removing the black lid of the Attenuator.
- Remove the safety lock bar and camera cover.
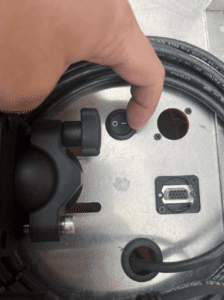
- Turn the Power switch to the ON position and the voltage indicator will light up and show current voltage.
Please note – it may take 10-15 seconds to turn on.
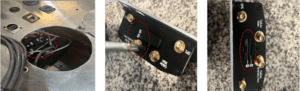
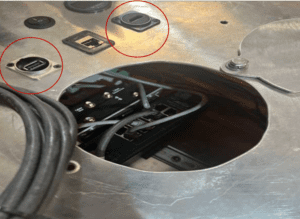
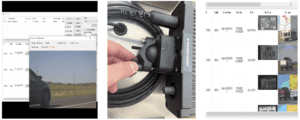
- If SIM Card needs to be installed, it can be found in the access panel shown below.
- Use a Phillips head precision screwdriver to remove the dust cover and insert the SIM card as shown on the device.
- Press down until you feel it click.
Please note – The Attenuator should be powered off during SIM card installation.
- Once the system is powered on and SIM card has been installed, connect an HDMI cable to the plug shown below and the other end to a monitor.
- Also, connect a keyboard and mouse to the USB plug.
- Once the monitor and keyboard/mouse have been hooked up, you need to verify Internet and configure the APN.
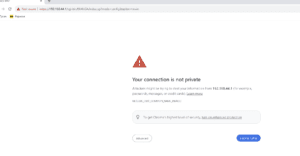
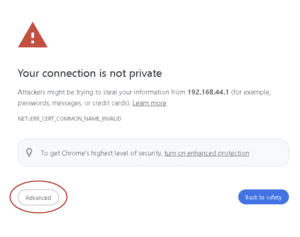
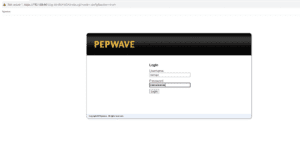
- Open the web browser and type 192.168.44.1 in the address bar and hit enter.
Select Advanced.
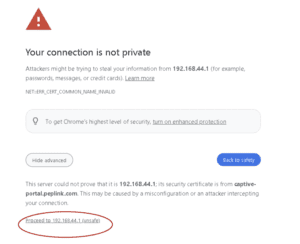
Select Proceed to 192.168.44.1
- Enter the Username and Password you have been provided.
- For additional assistance, please contact Customer Support.
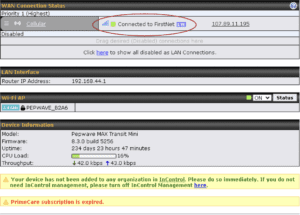
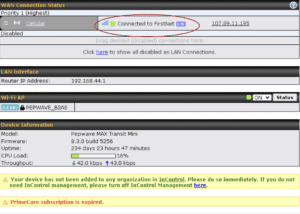
The home screen will show the status.
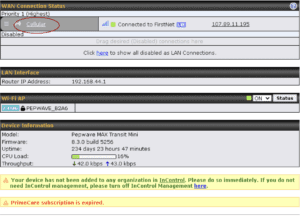
Select Cellular.
- Scroll down to operator settings and select Custom.
- Then type your APN in the field below.
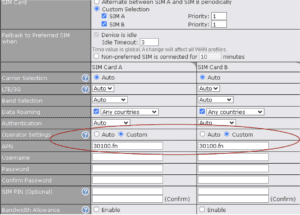
Scroll to the bottom and hit Save and Apply.

- This will take you back to the home screen.
- Allow a few minutes for the changes to take effect.
- You should see Connected on the home screen.
- While here, it is a good idea to check the firmware version.
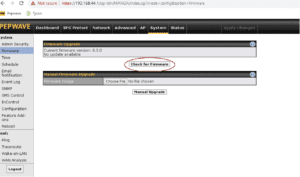
- Select the System tab.
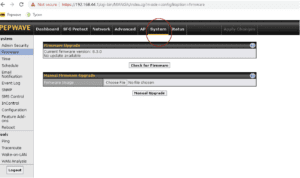
Select Firmware on the Left.
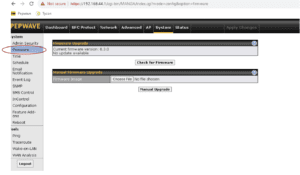
Then select Check for Firmware. If applicable, update firmware.
- (CBP ONLY) Now that we have Internet, exit the web browser.
- From the Home screen, run all necessary files and install CDX if it has not been installed already.
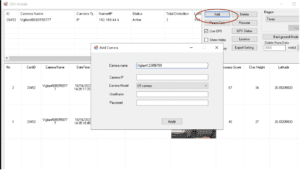
- Next, Open CDX and select the Add button.
- Camera name will be Vigilant followed by the camera serial number with no dashes or spaces.
- Camera IP will be 192.168.44.4 and camera model will be L5F.
- Leave username and password blank and select Apply.
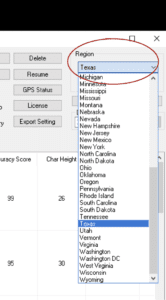
Select Region and choose your region from the drop-down menu.
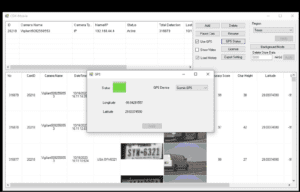
Verify GPS is working by ensuring the use GPS tab is selected and click GPS Status.
It should show green with accurate coordinates.
- To adjust the camera aim, click Show Video to pull up a live feed.
- The IR and color view circles will alternate the image.
- For daylight deployment you will want to use the color view, and IR for the night.
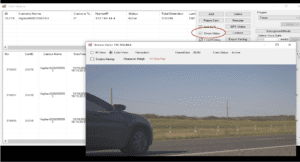
- With the Live feed pulled up, loosen the C clamp on the back of the camera and adjust as needed.
- The reads will begin to show up, allowing you to ensure you have a good view of the vehicle and a good image of the tag.
- Once satisfied with the aim, tighten the C clamp to lock the camera in place and cover with your shell.
Vetted Security Solutions Support #
The Vetted Security Solutions Support team is committed to answering all your day-to-day questions as quickly as possible. Please see the steps below for the support process:
- Go to https://vettedsecuritysolutions.com/support/
- Click on the “Support Ticket” Icon.
- Choose from the following options: LPR Technical Support, License Key Request, Account Management, CCTV and Surveillance, Thermal Camera Support, or Other Questions.
- When opening a support ticket, if you have multiple physical sites and or equipment impacted, please create an individual ticket for each. Do not bundle multiple different physical sites/equipment in the same support ticket.
- Please provide the following information: Your Name (Contact Name), Phone Number, Email, Company/Department, a summary, and a detailed description of the issue you are having. Attachments are optional.
- Press send to notify our help desk, and a confirmation email will be sent to the email address that you have provided.
- Once the ticket is updated/ or closed, it will send you an email notifying you that the support request has been modified/ or completed.
For issues requiring immediate technical support, please call the Vetted Security Solutions office number at (727) 440-3245 Ext 1.